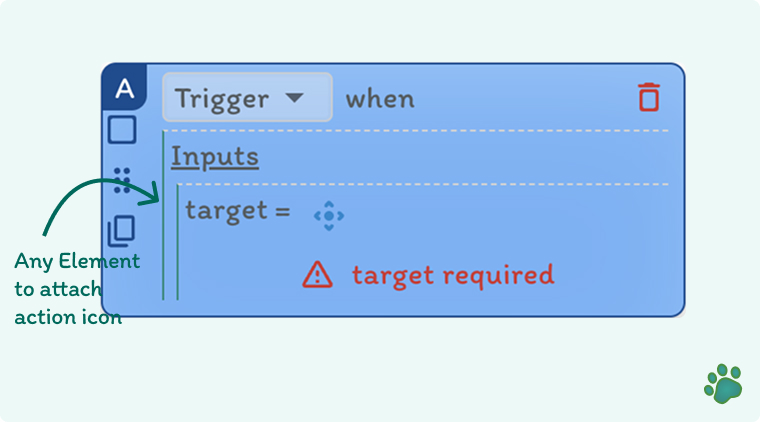
Trigger
The Trigger step in Snappit allows users to bind workflow initiators (triggers) directly to web page elements. This step provides a powerful way to expose workflows contextually within websites, making them accessible where and when they are needed.

🚀 Purpose
To attach a workflow trigger to a specified DOM element and URL pattern, enabling users to start automation directly from the page interface.
Triggers allow you to access and run your workflows just like you would run native browser tool
Triggers help:
- Embed workflows into user-facing experiences
- Simplify access to automation tools
- Support dynamic page structures with flexible URL patterns
⚙️ Inputs
- target – The specific DOM element to associate with the trigger. This is typically a button, icon, or visible component on the page. with URL pattern where the trigger should be active. This supports dynamic paths and query parameters to ensure flexibility
💡 Use Cases
- Attach an automation tool to a product card for managing inventory
- Bind form autofill workflows to login or registration buttons
- Make data collection or validation tools accessible on relevant pages
🌐 Dynamic URL Matching
Snappit's URL regex system allows you to define triggers that activate on pages with similar structures but different dynamic segments. This makes it ideal for use in:
- Product detail pages
- User profiles
- Transaction summaries
🛠️ Behavior
- Triggers are displayed as small action icons (Snappit buttons) near the selected element.
- When clicked, the associated workflow starts immediately.
- Multiple triggers can coexist and behave contextually based on the page URL and DOM element.
🔍 Summary
The Trigger step is a cornerstone for building workflow-enabled applications, turning Snappit into a true embedded automation tool. With it, users can launch workflows effortlessly at the point of need, improving efficiency and user experience across platforms.